Introduction
The MPT protocol used to access files via USB on your phone is not that
efficient. This post shows you an alternative to MTP for accessing your files on
your mobile phone. It works by installilng an SSH server on your phone using
Termux 1 and then use it to transfer files from and to your phone. This
can be done either via the Wi-Fi network or by tunneling the SSH traffic through
the USB cable using adb.
The Problem with MTP
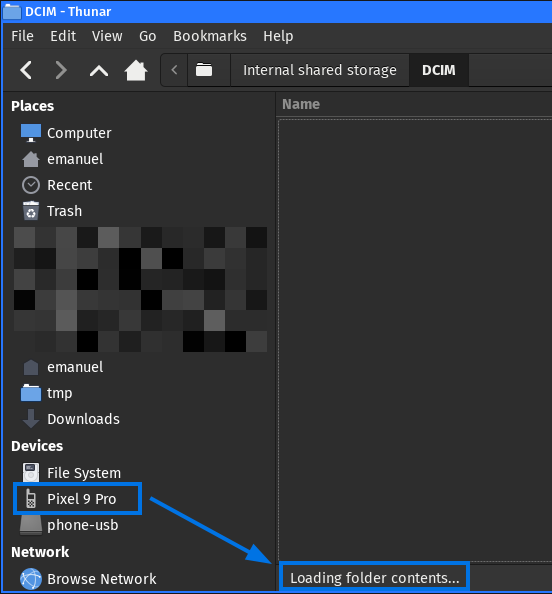
When connecting the phone via USB to your computer, the Media Transfer Protocol (MTP) is used 2. When I transfer files via MTP between my computer and phone, it is sometimes really slow, especially when transferring lots of small files. Also, while a file transfer is in progress, browsing through the phone filesystem is very slow or even impossible. Even opening an directory for the first time takes ages:
An Internet search shows that I’m not the only one with this problem.
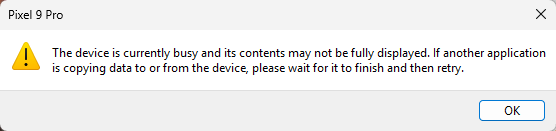
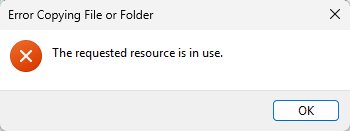
I use Linux as a daily driver OS and thought maybe this is only a Linux issue. However, when testing MTP on a Windows 11 installation (on a real hardware, no VM), there are the same problems. I just wanted to copy a large file from my Pixel phone when I wanted to browse the folders during an ongoing copy process, I got several errors telling me that the device is currently busy:
This confirmed that MTP is not really usable for me and I looked for an alternative that works or me. In the end, I came to the conclusion that the most reliable setup for me is using SSHFS over Wi-Fi or USB.
Initial Setup
Install Termux
Termux is an terminal emulator and Linux environment for Android. The base
system contains some useful well-known Linux tools and you can install
additional packages via the pkg packet manager. It does not require a rooted
phone 1. Termux can be installed from Google Play 3.
When the app is opened, you have a shell where you can execute commands. The commands are executed as the dedicated sandbox user of the Termux app.
Type id to get the application user:
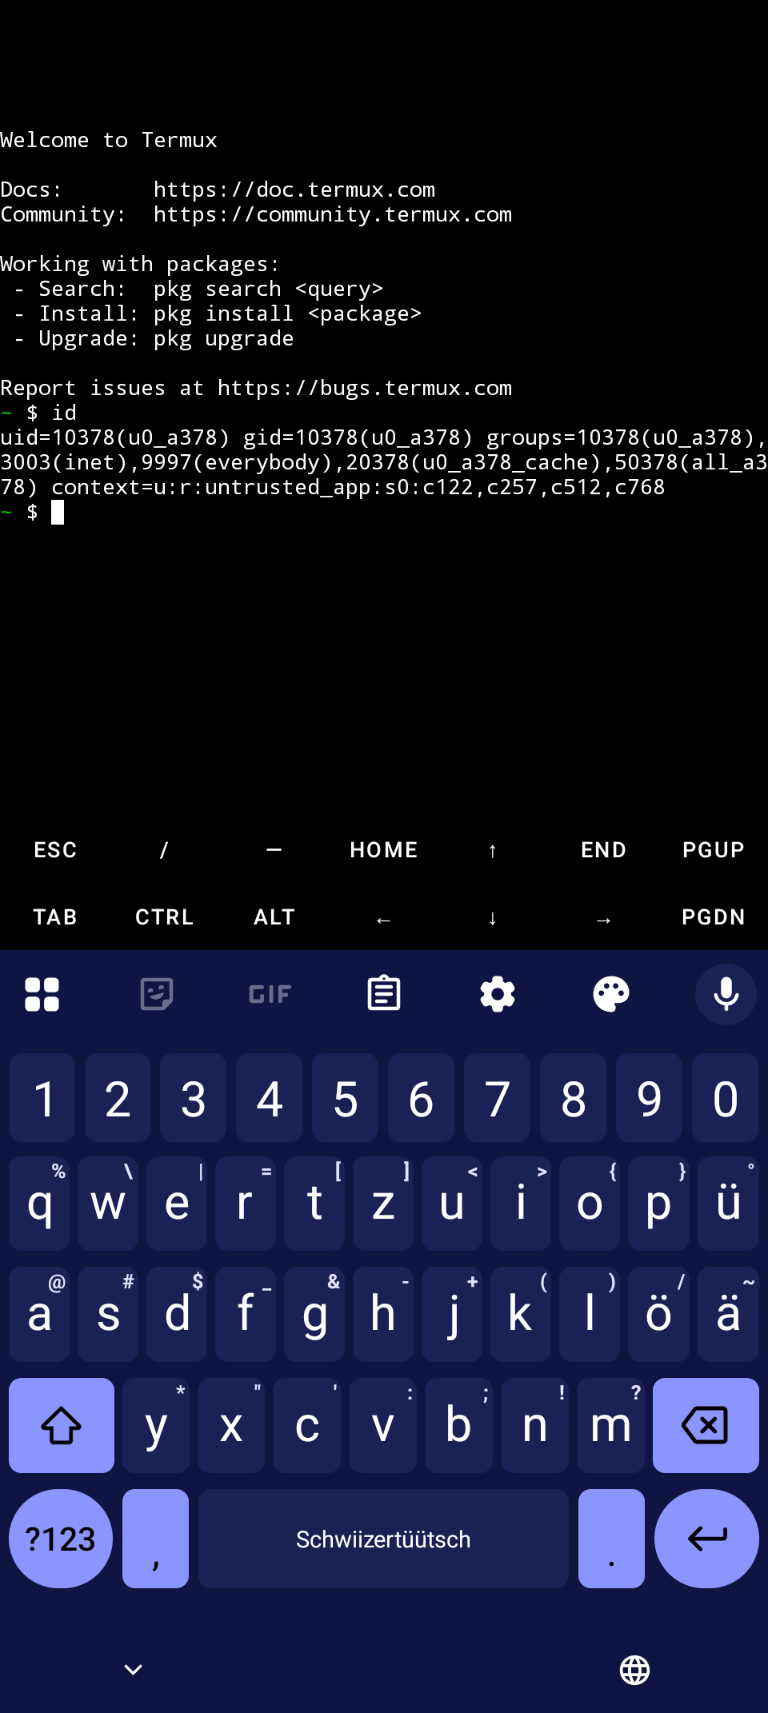
- In this case, the dedicated user is
u0_a378. You will need this information later again.
Install Termux Packages
Install SSH and netcat (the modern one from the nmap project):
~ $ pkg install -y openssh ncat
Give Termux File Access
Setup storage access 4, so Termux, is able to access your files:
~ $ termux-setup-storage
You then have to give Termux full file access:
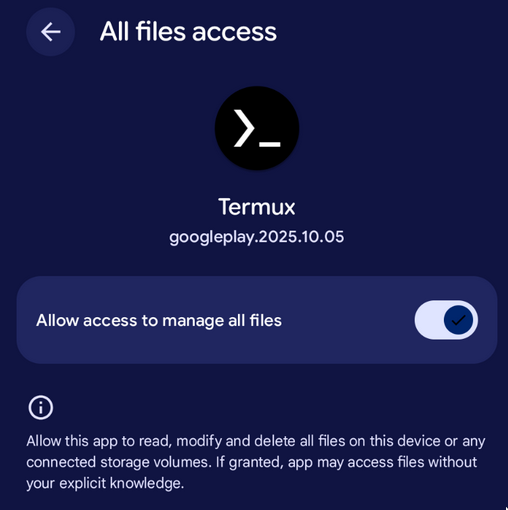
You have now access to the files on your phone from the Termux shell:
~ $ ls storage/
audiobooks  documents  external-0  movies  pictures  shared
dcim        downloads  media-0     music   podcasts
Sidenote: Termux has all it’s config files in /data/data/com.termux/files/usr/etc:
~ $ cd /data/data/com.termux/files/usr/etc

.../usr/etc $ ls -l
total 54
drwx------. 2 u0_a378 u0_a378 3452 Jan  2 16:12 alternatives
drwx------. 6 u0_a378 u0_a378 3452 Jan  2 16:03 apt
-rw-------. 1 u0_a378 u0_a378 1204 Jan  2 16:03 bash.bashrc
-rw-------. 1 u0_a378 u0_a378   38 Jan  2 16:03 hosts
-rw-------. 1 u0_a378 u0_a378  489 Jan  2 16:03 inputrc
-rw-------. 1 u0_a378 u0_a378  387 Aug 28 22:51 krb5.conf
-rw-------. 1 u0_a378 u0_a378  250 Jan  2 16:03 motd
-rw-------. 1 u0_a378 u0_a378   61 Jan  2 16:03 nanorc
-rw-------. 1 u0_a378 u0_a378  592 Jan  2 16:03 profile
drwx------. 2 u0_a378 u0_a378 3452 Jan  2 16:03 profile.d
-rw-------. 1 u0_a378 u0_a378   38 Jan  2 16:03 resolv.conf
drwx------. 4 u0_a378 u0_a378 3452 Jan  2 16:07 ssh
-rw-------. 1 u0_a378 u0_a378  101 Jan  2 16:03 termux-login.sh
drwx------. 2 u0_a378 u0_a378 3452 Jan  2 16:03 tls
Setup SSH Access
Connect the phone and your computer to the same Wi-Fi.
On your computer, start a TCP listener which offers your public key (make sure your computer allows incoming connections on the specified port):
$ ncat -vnl 2323 < .ssh/id_ed25519.pub
Ncat: Version 7.98 ( https://nmap.org/ncat )
Ncat: Listening on [::]:2323
Ncat: Listening on 0.0.0.0:2323
Download the public key to your phone in the Termux shell:
~ $ ncat -v 192.168.23.23 2323 >> .ssh/authorized_keys
Ncat: Version 7.98 ( https: nmap.org/ncat )
Ncat: Connected to 192.168.23.23: 2323.
Ncat: 0 bytes sent, 92 bytes received
⚠️ Compare the received public key with your public key to ensure you got the correct one!
The ncat command on your computer shows the IP address of the phone:
$ ncat -vnl 2323 < .ssh/id_ed25519.pub
[...]
Ncat: Connection from 192.168.23.240:50230.
Start the SSH server in your Termux shell:
~ $ sshd
The SSH server is now running:
~ $ ps -ef
UID        PID  PPID  C STIME TTY          TIME CMD
u0_a378  25823 25722  0  1970 pts/0    00:00:00 /data/data/com.termux/fil
u0_a378  29478     1  0  1970 ?        00:00:00 sshd /data/data/com.termu
u0_a378  29547 25823  2  1970 pts/0    00:00:00 ps /data/data/com.termux/
By default, the SSH server listens on port 8022:
~ $ sshd -T | grep ^port
port 8022
Testing SSH Access
You can now access the phone from your computer via SSH over the Wi-Fi network.
Use the username from the id command executed in the beginning and the IP
address from the previous ncat output:
$ ssh -p 8022 u0_a378@192.168.23.240
The authenticity of host '[192.168.23.240]:8022 ([192.168.23.240]:8022)' can't be established.
ED25519 key fingerprint is: SHA256:I/kt//F26npvlmeQO/w9x0PmUS2K5PQ3BnPM3JGj01Q
No matching host key fingerprint found in DNS.
This key is not known by any other names.
Are you sure you want to continue connecting (yes/no/[fingerprint])? yes
Warning: Permanently added '[192.168.23.240]:8022' (ED25519) to the list of known hosts.
Welcome to Termux

Docs:       https://doc.termux.com
Community:  https://community.termux.com

Working with packages:
 - Search:  pkg search <query>
 - Install: pkg install <package>
 - Upgrade: pkg upgrade

Report issues at https://bugs.termux.com

~ $ id
uid=10378(u0_a378) gid=10378(u0_a378) groups=10378(u0_a378),3003(inet),9997(everybody),20378(u0_a378_cache),50378(all_a378) context=u:r:untrusted_app:s0:c122,c257,c512,c768

~ $
You can now access your phone via SSH.
File Access via SSH over Wi-Fi
SSH Configuration
On your computer, add the following configuration to your user-specific SSH
configuration file in ~/.ssh/config:
$ cat .ssh/config
[...]

Host phone-wifi
  HostName 192.168.23.240
  User u0_a378
  Port 8022

[...]
You can now use a simple SSH command to get a shell on your phone:
$ ssh phone-wifi
Welcome to Termux
[...]

~ $
File Copy
This means you can now also copy files from your computer to the phone using
scp:
$ scp testfile phone-wifi:/storage/emulated/0/DCIM
testfile                     100% 5120MB  30.3MB/s   02:48
Or download files again:
$ scp phone-wifi:/storage/emulated/0/DCIM/testfile  /tmp/test
testfile                      100% 5120MB  24.9MB/s   03:25
Mount Phone File System
SSHFS 5 allows you to mount a remote filesystem using SFTP, which is also enabled by default in the Termux SSH server. SSHFS uses the FUSE interface, so everything is implemented in user space 6. No configuration change or installation is required on the server side. The SSHFS client package is available for all major Linux distributions.
Mount the storage of your phone using SSHFS:
$ mkdir /tmp/phone

$ sshfs phone-wifi:/storage/emulated/0 /tmp/phone/

$ cd /tmp/phone/

$ ls
Android  Audiobooks  Backup  DCIM  Download
Movies  Music  Pictures  Threema  ThreemaWork  tmp
You can now browse and access the files as you want, also in your graphical file browser.
When finished, unmount the phone filesystem again:
$ umount /tmp/phone
File Access via SSH over USB
ADB Configuration
The Android Debug Bridge (adb) is a tool that lets you communicate with your
Android device 7. You can e.g. execute commands on your phone or forward
TCP traffic.
First, you have to enable developer options on your phone. For this, you have to press 7 times on the build number in the settings menu. See the guide 8 for more details.
Connect your phone to your computer via USB try to list it:
$ adb devices
List of devices attached
46271FDAP000D1  device
You have to accept the prompt on the phone to give your computer access to the USB debugging capabilities.
Forward your port 8022 on your computer to the port 8022 on the phone:
$ adb forward tcp:8022 tcp:8022
8022

$ adb forward --list
46271FDAP000D1 tcp:8022 tcp:8022
SSH Configuration
On your computer, add the following configuration to your user-specific SSH configuration file:
$ cat .ssh/config
[...]

Host phone-usb
  HostName 127.0.0.1
  User u0_a378
  Port 8022

[...]
You can now use a simple SSH command to get a shell on your phone:
You can now SSH to your phone via USB:
$ ssh phone-usb
The authenticity of host '[127.0.0.1]:8022 ([127.0.0.1]:8022)' can't be established.
ED25519 key fingerprint is: SHA256:I/kt//F26npvlmeQO/w9x0PmUS2K5PQ3BnPM3JGj01Q
No matching host key fingerprint found in DNS.
This key is not known by any other names.
Are you sure you want to continue connecting (yes/no/[fingerprint])? yes
Warning: Permanently added '[127.0.0.1]:8022' (ED25519) to the list of known hosts.

Welcome to Termux
[...]

~ $ id
uid=10378(u0_a378) gid=10378(u0_a378) groups=10378(u0_a378),3003(inet),9997(everybody),20378(u0_a378_cache),50378(all_a378) context=u:r:untrusted_app:s0:c122,c257,c512,c768

~ $ ls
storage
File Copy
As shown via Wi-Fi, you can now copy files to the phone using scp:
$ scp testfile phone-usb:/storage/emulated/0/DCIM
testfile                      100% 5120MB  27.1MB/s   03:09
Or download again:
$ scp phone-usb:/storage/emulated/0/DCIM/testfile  /tmp/test
testfile                     100% 5120MB  38.3MB/s   02:13
Mount Phone File System
Again, you can now mount the storage of your phone using SSHFS but this time tunneled over USB:
$ sshfs phone-usb:/storage/emulated/0 /tmp/phone/

$ cd /tmp/phone/

$ ls
Android  Audiobooks  Backup  DCIM  Download
Movies  Music  Pictures  Threema  ThreemaWork  tmp
You can now browse and access the files as you want.
ADB Cleanup
You can check if you have forwarded ports:
$ adb forward --list
46271FDAP000D1 tcp:8022 tcp:8022
If you don’t use them anymore, you can remove them:
$ adb forward --remove-all

$ adb forward --list
Automatic Port Forwarding SSH Configuration
To automatically configure port forwarding via SSH, you can use the following
SSH client configuration, which executes the adb command before connecting:
$ cat .ssh/config
[...]

Match host phone-usb exec "adb forward tcp:8022 tcp:8022"
  HostName 127.0.0.1
  User u0_a378
  Port 8022

[...]
You now don’t have to execute the ADB command, it’s executed automatically:
$ adb forward --list

$ ssh phone-usb
Welcome to Termux
[...]

~ $
Auto-Mount
If you don’t want to enter the sshfs command in your terminal, you can add an
entry in the file system table, so you can easily mount the filesystem from your
graphical file explorer.
Add a new entry in /etc/fstab:
$ sudo vi /etc/fstab
[...]

phone-usb:/storage/emulated/0  /media/phone-usb  sshfs _netdev,user,transform_symlinks 0 0
phone-usb:/storage/emulated/0: This is the hostname from your SSH configuration file (eitherphone-usborphone-wifi, whatever you prefer) and the directory on the phone you want to mount/media/phone-usb: Local directory where you want to mount the phone directory. You have to create this directory manually with write-permission for your user.sshfs: The filesystem type SSHFS_netdev: It’s a network deviceuser: Normal users should be allowed to mounttransform_symlinks: transform absolute symlinks on remote side to relative symlinks on the client. This means that if e.g. on the server side/foo/bar/bazis a symlink to/foo/spam, SSHFS will transform the link target to../bazon the client side.
You can then directly click in your file explorer on the shortcut and the filesystem will be mounted. If you have a passphrase protected SSH key, it will ask for your passphrase:
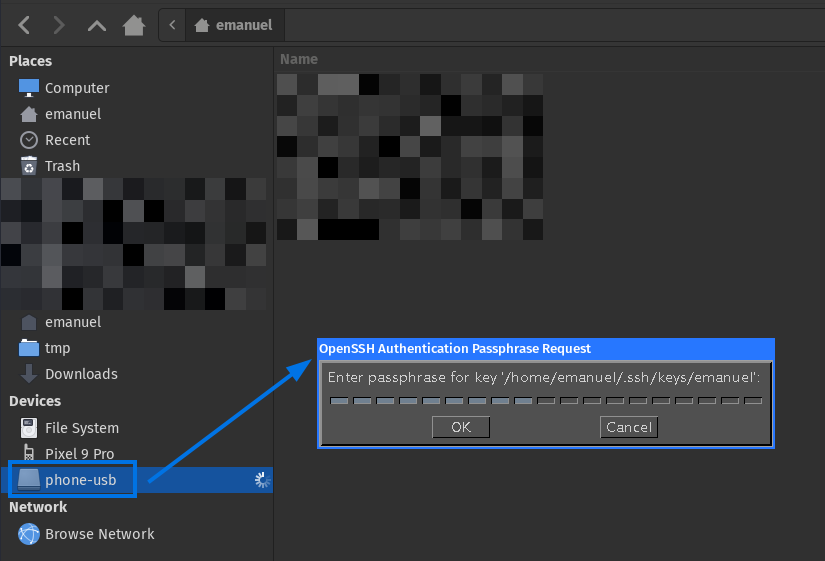
After entering the SSH key passphrase, the file system is mounted and the files can be accessed much faster than when using MTP.
Result
You now have two methods to access your phones’ files in a faster and more reliable way than when using MTP.
Have fun 😃.
-
Termux WIki: https://wiki.termux.dev/wiki/Main_Page ↩︎ ↩︎
-
MTP implementation libmtp: https://libmtp.sourceforge.net/ ↩︎
-
Google Play, Termux: https://play.google.com/store/apps/details?id=com.termux&hl=en ↩︎
-
Termux Wiki, Termux-setup-storage: https://wiki.termux.com/wiki/Termux-setup-storage ↩︎
-
GitHub, FUSE (Filesystem in Userspace) Interface: https://github.com/libfuse/libfuse ↩︎
-
Android Developers, Android Debug Bridge (adb): https://developer.android.com/tools/adb ↩︎
-
Android Developers, Configure on-device developer options: https://developer.android.com/studio/debug/dev-options ↩︎